Mango season is upon us, and markets are full of the fruit. Now is a great time to make some Thai Sticky Rice With Mango, like I did. 🙂

What is Thai Sticky Rice With Mango?
It is a unique dessert that hails from Thailand, a country whose cuisine I love for its bold flavours. Sticky rice, a special type of rice available in Thailand, is cooked in a pan with some fragrant pandan (screwpine) leaves. Fresh coconut milk and sugar is used to make a sauce, which is poured over the cooked rice when completely cool. This is served with wedges of sweet and sour ripe mango. What an interesting blend of flavours and textures, right?
For those who have never tasted Thai Sticky Rice With Mango, let me tell you that it is mind-blowingly beautiful. The sweetened, coconut-ty sticky rice blends wonderfully with the sweet-sour notes in the mango. Mango and coconut is a match made in heaven, after all.
A bit about my version of Thai Sticky Rice With Mango
I was introduced to the beauty that is Thai Sticky Rice With Mango on our holiday in Thailand. I absolutely adored it, of course. And then I went on to enjoy the dish at several Pan-Asian restaurants, each time falling a little deeper in love with it. Somehow, in spite of my love for it, Thai Sticky Rice With Mango remained that exotic thing that I always had at fancy restaurants, but never tried making at home. Until, recently, when I saw the making of the dessert in the Slurpy Platter’s Instagram stories.
I realised then just how simple this dessert was to whip up at home – like most of the other Thai dishes I have successfully recreated – and had to give it a go. Of course, I had to give it some twists! So, I used jasmine rice instead of the Thai sticky rice that is used traditionally, and cooked it in a pressure cooker instead of a pan, with some coconut milk added in. The result was absolutely brilliant, as the husband and extended family attests. 🙂 Purists can baulk if they want to – this might not be the most authentic of Thai Sticky Rice With Mango, but it is surely gorgeous. And, hey, it’s so much easier to put together this way, so a complete win-win situation, I say.
Is this dessert vegan and gluten-free?
Yes! This lovely dessert is completely vegetarian and vegan, suited to people following a plant-based diet. It is entirely gluten-free as well.
How to make Thai Sticky Rice With Mango
Here’s how I went about it, with a few deviations from the original recipe.
Ingredients (serves 2):
To pressure cook:
- 1/2 cup jasmine rice
- 1/2 cup thick coconut milk
- 1/2 cup water
Other ingredients:
- 1/2 cup thick coconut milk
- 2 tablespoons sugar or to taste
- 3-4 drops + 3-4 drops of pandan essence
- 1 big ripe mango
- 1 teaspoon sesame seeds
Method:

1. Wash the jasmine rice well under running water. Drain out all the water from it. Transfer the drained rice to a wide vessel.
2. Add 1/2 cup of thick coconut milk and 1/2 cup of water to the vessel. Mix well.
3. Place the vessel in a pressure cooker. Pressure cook on high flame for 3 whistles. Let the pressure release naturally.
4. In the meantime, let’s prepare the coconut sauce. Take 1/2 cup of thick coconut milk in a saucepan, and add in 2 tablespoons sugar. Place on high flame. Let the sugar get completely dissolved in the coconut milk. When the coconut milk starts boiling, switch off gas. Now, add 3-4 drops of pandan essence to it, and mix well. The coconut sauce is ready. Let it cool down fully.
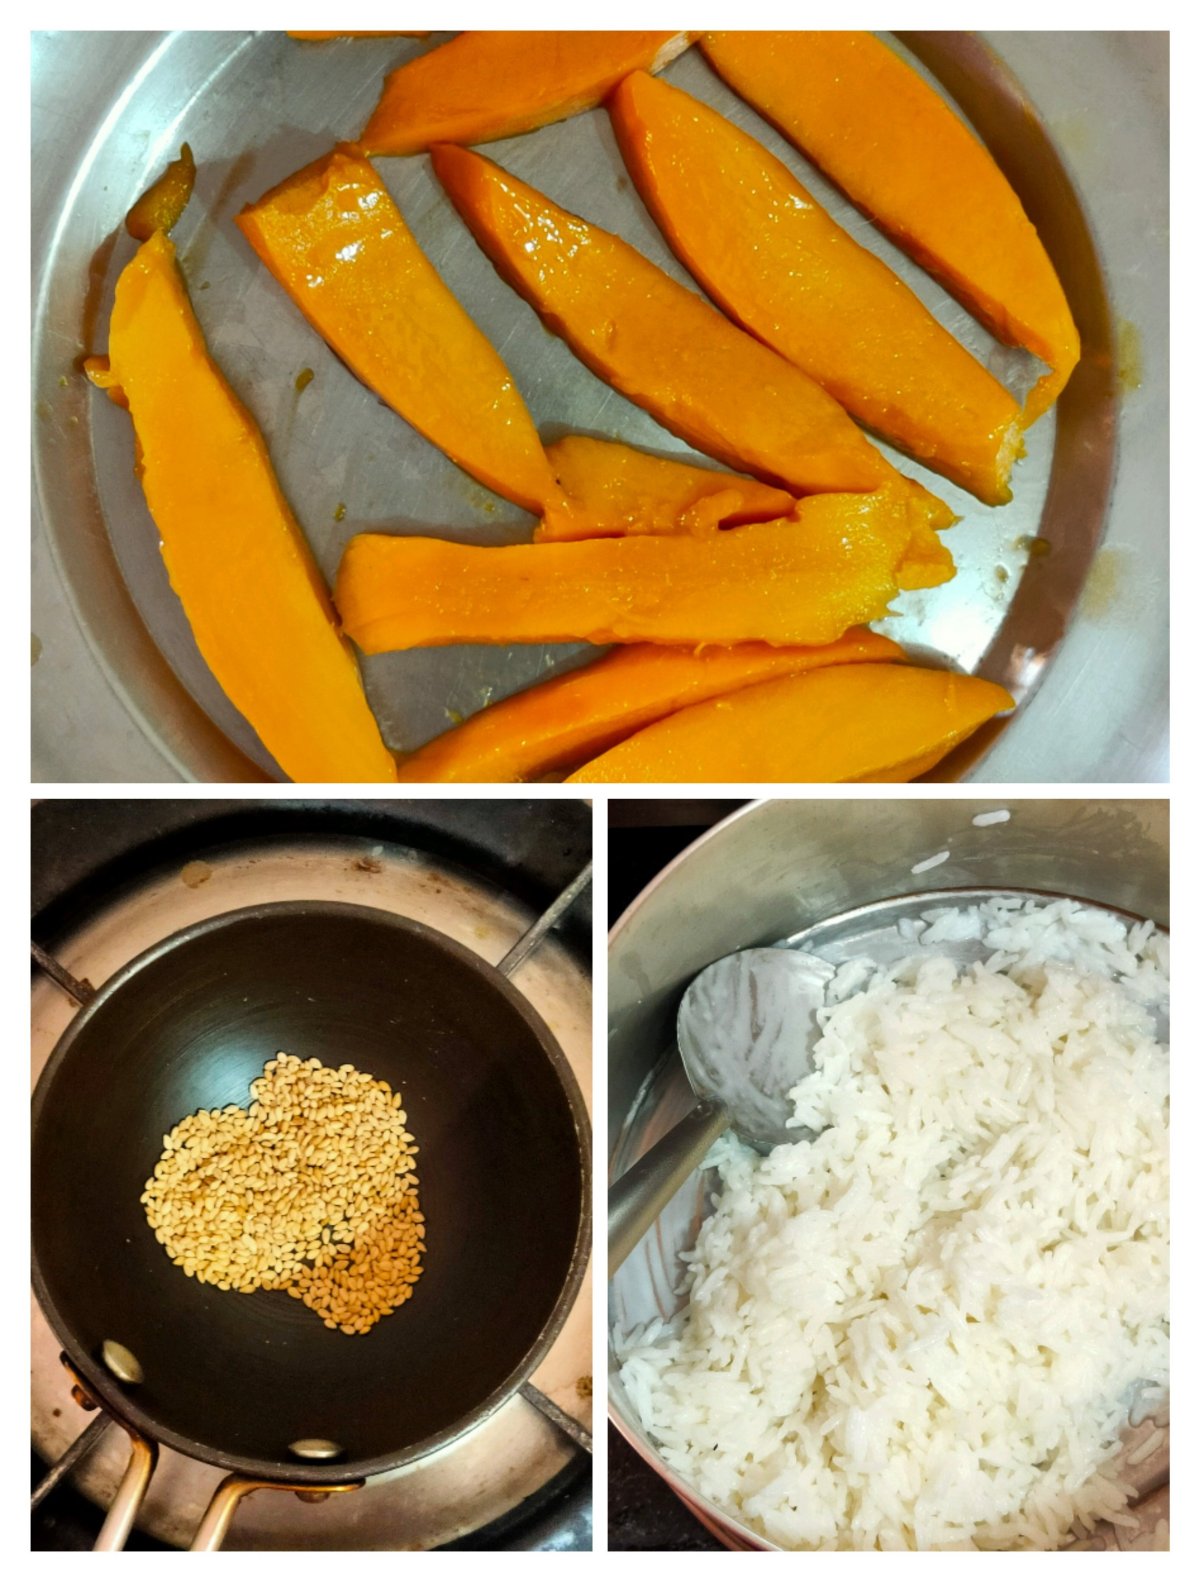
5. Peel the mango and cut into length-wise pieces. Keep them ready.
6. Now, dry roast the sesame seeds in a small pan on medium flame, till they are toasted and start popping. Don’t let them burn. Transfer the sesame seeds to a plate and allow them to cool down.
7. When the pressure from the cooker has completely gone down, get the cooked rice out. Fluff it up gently. Mix in 3-4 drops of pandan essence into the rice. Allow it to cool down fully.
8. Once the rice, sesame seeds and coconut sauce are completely cool, you can assemble the serving dishes. Divide the rice into three equal portions, and place one in the centre of two serving dishes. Pour the coconut sauce evenly over both portions of rice and around it. Arrange the mango slices around the rice, in both dishes. Lastly, decorate the rice in both serving dishes with the toasted sesame seeds. Serve immediately.
Tips & Tricks
1. This dish is traditionally made using Thai sticky rice. However, I didn’t have any, so I used Thai jasmine rice instead, and it worked beautifully. I think Basmati rice would work well too. I have also seen this dish made using black rice. You can use regular Sona Masoori rice instead, too.
2. Use a ripe, juicy but firm mango for best results. I used a nice sweet and slightly sour Mallika mango, and it was just perfect.
3. I have used a 200 ml carton of Dabur Homemade Coconut Milk here. You can make your own coconut milk at home, if you so prefer.
4. Traditionally, the rice is cooked in a pan, however I made it in a pressure cooker. It worked well.
5. If you have fresh pandan (screwpine) leaves, add one while cooking the rice. I didn’t have them, so I have used pandan essence instead, a few drops in the rice and a few in the coconut sauce.
6. You can use roasted moong dal for the garnishing, instead of the toasted sesame seeds. I much prefer the sesame seeds.
7. Adjust the quantity of sugar in the coconut sauce, as per personal taste preferences.
8. Adjust the quantity of pandan essence you use, depending upon personal taste preferences.
9. You can mix the cooked rice and the coconut sauce together, and then serve it with the mango slices and toasted sesame seeds. I prefer serving it this way.
10. I picked up the jasmine rice and pandan essence at the Siam Paragon mall in Bangkok, Thailand. For those in Bangalore, the rice is available at Namdhari’s.
Did you like the recipe? Do tell me, in your comments!

This looks so beautiful! Thank you for sharing this recipe. I’ve had Thai Sticky Rice with Mango at a restaurant and it was truly wonderful. 🙂
LikeLike
@Suko
Thank you so much! It’s delicious, and very easy to make at home. 🙂
LikeLike
It’s pretty hard to find sticky rice at affordable prices…so this recipe surely a saviour 😂
LikeLike
@Lina
Both sticky rice and jasmine rice are available at Namdhari’s at pretty affordable rates. You should check out the store. 🙂
LikeLike
Great will check it out…I have generally bought them at nature’s basket
LikeLike
@Lina
Ah ok
LikeLike